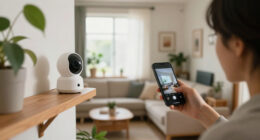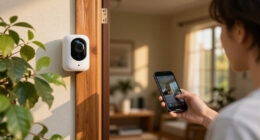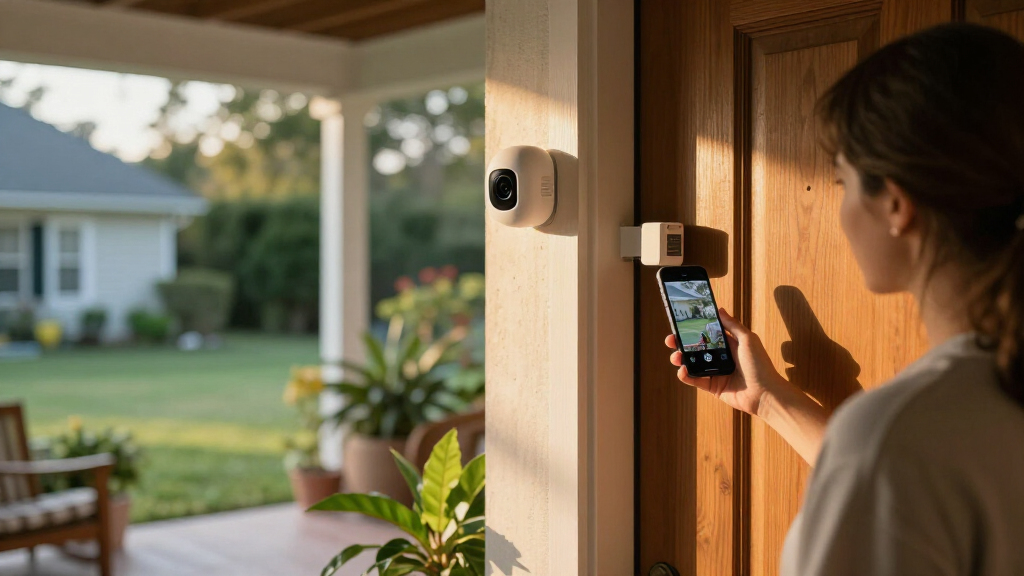
Use this guide to plan camera coverage, install smart home security cameras, connect them to your network, and test recording and alerts. It is for homeowners and renters with basic smartphone and Wi-Fi skills. Allow 1–3 hours, depending on the number of cameras and whether any need wiring. You will finish with cameras positioned for useful views, secure account settings, and a tested way to review footage.

Get home appliances delivered free — and shop member deals
- Fast, free delivery on millions of items
- Access to Prime Big Deal Days deals on October 6–7
- Prime Video, Amazon Music and more included

Blink Outdoor 4 Wireless Smart Security Camera System (5 Cameras)
- ✔ Camera count: 5
- ✔ Live video: 1080p HD, up to 30 fps
- ✔ Field of view: 143° diagonal
Blink Outdoor 4 Wireless Smart Security Camera System, 3 Cameras, 2-Year Battery Life
- ✔ Camera count: 3
- ✔ Battery life: Up to 2 years
- ✔ Video resolution: 1080p HD
Blink Outdoor 4 Wireless Smart Security Camera System (2 Cameras, Sync Module Core)
- ✔ Camera count: 2
- ✔ Battery life: Up to 2 years
- ✔ Video resolution: 1080p HD
Difficulty: Beginner | Time: 1-3 hours
What You’ll Need
Tools & Materials:
- Smartphone or tablet with the camera maker’s app
- Camera, mounting hardware, and power adapter or batteries
- Home Wi-Fi name and password
- Screwdriver and drill, if mounting into walls or ceilings
- Ladder, if installing above ground level
- Measuring tape and pencil for marking mounting points
Knowledge:
- Basic use of a smartphone app and Wi-Fi settings
- How to use a screwdriver; drilling skills if the installation requires drilling
Set aside 1–3 hours and check the camera’s Wi-Fi band, power needs, weather rating, and app requirements before opening the box. Some cameras connect only to 2.4 GHz Wi-Fi; others support 5 GHz or both. Check local rules and lease terms before recording shared spaces, public areas, or a neighbor’s property. Do not drill near suspected electrical cables, plumbing, or gas lines.
Blink Outdoor 4 Wireless Smart Security Camera System (5 Cameras)
Among these three bundles, the five-camera system is the most capable starting point for a home with several outdoor approaches to monitor. It can distribute cameras across front and back doors, a garage, and another vulnerable area without requiring an immediate expansion. The other two kits share the same core 1080p and night-vision features, but neither matches this bundle’s out-of-the-box coverage.Wireless installation and the stated up to two-year battery life can make placement more flexible than a system that needs a power outlet at every camera. That convenience has limits: each unit uses two non-rechargeable AA lithium batteries, so eventually replacements are part of ownership, and actual battery life can vary with activity and use. The 143-degree diagonal field of view helps each camera take in a broad scene, while two-way audio and infrared night vision add useful everyday monitoring functions.The main reason not to choose this kit is that the higher camera count only helps if you have useful places to put all five. Buyers focused on two entrances can avoid unused hardware with the smaller bundles. Also, Sync Module Core does not include local storage; cloud storage is offered with a trial and then requires a subscription, while person alerts are subscription-dependent. We rank this first for coverage, not because it adds a better camera or removes the platform’s storage tradeoffs.
Pros:
- Five cameras provide the broadest included coverage in this comparison.
- 1080p live view, infrared night vision, and two-way audio support basic day-and-night monitoring.
- Wireless placement avoids running power to each camera.
- Alexa compatibility and the Blink app support a straightforward connected setup.
Cons:
- Sync Module Core does not include local storage; additional storage options require accessories.
- Person alerts require an optional subscription, and cloud storage terms change after the trial.
- Each camera uses non-rechargeable AA lithium batteries, and battery life varies with use.
Best for: Households that want to monitor several exterior doors, walkways, or other distinct outdoor zones in one setup.
Not ideal for: Apartment residents or buyers who need only one or two camera locations, or anyone who requires included local recording.
Bottom line: We recommend the five-camera bundle when broad coverage matters more than keeping the system small, but it shares the other kits’ storage and subscription limitations.
“We recommend the five-camera bundle when broad coverage matters more than keeping the system small, but it shares the other kits’ storage and subscription limitations.”
Blink Outdoor 4 Wireless Smart Security Camera System, 3 Cameras, 2-Year Battery Life
The three-camera Outdoor 4 kit sits between the other two in the most meaningful way: it offers more coverage than the two-camera system without asking buyers to plan for five camera positions. For many homes, that can mean monitoring a front entrance, rear entrance, and one additional area such as a driveway or side path. Its core imaging and smart-home features are otherwise aligned with the larger kit, so we see this as a choice about coverage scale rather than camera performance.Each camera offers 1080p live video, infrared night vision, and two-way audio, with wireless setup and Alexa integration. The advertised battery life of up to two years makes the system appealing when running power cables would be awkward, although the figure is not a promise of a fixed interval. The included Sync Module Core connects the system, but the supplied description does not identify local storage as included. Buyers who want local recordings should check the compatible optional storage route before choosing.Compared with the five-camera bundle, this option keeps the installation more manageable and avoids paying attention to cameras that may have nowhere useful to go. Compared with the two-camera kit, it gives a home more flexibility for layered coverage. It does not solve the shared subscription issue: person detection requires an optional plan, and additional storage options are sold separately. We place it second because it is the most adaptable middle ground, while the five-camera kit better serves homes whose priority is maximum coverage from day one.
Pros:
- Three cameras offer a practical middle ground between the two- and five-camera kits.
- 1080p video and infrared night vision match the core viewing features of the other bundles.
- Wireless setup can simplify placement where power access is limited.
- Works with Alexa for compatible voice-control routines.
Cons:
- Local storage is not included with Sync Module Core.
- Person detection depends on an optional subscription.
- The advertised battery life can vary with camera activity and settings.
Best for: Buyers who want to cover three priority areas and prefer a middle-sized system rather than the smallest or largest bundle.
Not ideal for: Homes that need extensive perimeter coverage immediately, or users who want local storage included in the box.
Bottom line: We see the three-camera kit as the most balanced choice for ordinary multi-entry coverage, provided buyers accept optional storage and detection services.
“We see the three-camera kit as the most balanced choice for ordinary multi-entry coverage, provided buyers accept optional storage and detection services.”
Blink Outdoor 4 Wireless Smart Security Camera System (2 Cameras, Sync Module Core)
For a small home or a buyer starting with two priority entrances, the two-camera bundle is the least complicated fit in this lineup. It includes the same Outdoor 4 essentials as the larger kits—1080p HD video, infrared night vision, two-way audio, wireless operation, and Alexa compatibility—but limits the system to two camera positions. That makes it easier to begin with the areas that matter most rather than planning a full perimeter layout immediately.The system’s up to two-year battery-life claim is attractive for placements without nearby power, though the batteries are not rechargeable and real-world replacement intervals depend on use. The included Sync Module Core and Blink app form the basic connected setup. As with the other bundles, however, the hub does not include local storage. The kit’s cloud storage trial is temporary, and continued cloud use or person alerts may involve an optional subscription.Compared with the three-camera kit, this one sacrifices a third viewpoint, which can matter if a driveway or side entrance is also a concern. Compared with the five-camera package, it is easier to justify when only a couple of zones need monitoring, but it is not the best route to broad coverage. We rank it third because its smaller scale is a clear advantage for focused use, not because its cameras are weaker. Buyers should skip it if they already know they need three or more outdoor views or want recording stored locally without buying additional accessories.
Pros:
- Two cameras suit a focused setup around the most important entrances.
- 1080p live view and infrared night vision match the larger bundles’ core camera features.
- Wireless installation and Alexa compatibility keep setup flexible.
- The smaller camera count can make initial placement and system planning simpler.
Cons:
- Two viewpoints may leave additional entrances or exterior zones uncovered.
- Sync Module Core does not include local storage; optional accessories are needed for that route.
- Person alerts require an optional subscription, and batteries are non-rechargeable.
Best for: Apartment residents, smaller households, and first-time buyers who want to monitor two specific entrances or outdoor areas.
Not ideal for: People who need to watch multiple sides of a house or require included local storage and subscription-free person alerts.
Bottom line: We recommend the two-camera kit for compact, targeted monitoring, but buyers planning wider coverage should step up to the three- or five-camera bundle.
“We recommend the two-camera kit for compact, targeted monitoring, but buyers planning wider coverage should step up to the three- or five-camera bundle.”
As an Amazon Associate we earn from qualifying purchases.
Before You Start
Choose cameras and locations before drilling. Make sure each location has a suitable power source or supports the camera’s battery and charging plan. Check the Wi-Fi signal at each position with a phone; a weak signal can cause delays or missed recordings. Review the maker’s instructions for mounting height, operating temperature, and required clearance. If installing outdoors, use only equipment rated for outdoor use and follow the manufacturer’s instructions for weather sealing. Keep cameras out of reach when possible, but do not place them where they cannot capture useful detail.
Step-by-Step Instructions
Step 1: Plan what each camera needs to see
Walk through your home and list the areas you want to monitor, such as an entry door, driveway, or main hallway. Assign each camera one main view. Aim to see faces and approach paths rather than only the tops of people’s heads or a large empty area. Consider where packages are left and where someone would enter or move through the space. Avoid pointing cameras into bedrooms, bathrooms, or other private areas. Frame outdoor views to limit recording of neighbors’ windows and nearby private property.
Tip: Do not assume one wide-angle camera can clearly identify activity across an entire yard. A closer, well-aimed view is often more useful.
Check: You can describe what each camera should capture and have selected locations that respect privacy.
Step 2: Check power and Wi-Fi at each location
Confirm that each camera can reach its power source, or plan when and how often you will recharge its battery. Stand at each proposed location with your phone and check the Wi-Fi signal. If the camera app offers a connection test, use it after adding the camera as well. Move the location closer to the router or plan a compatible access point if the signal is weak. Check that the router and camera support the same Wi-Fi band and security settings.
Tip: Avoid hiding a camera behind metal, thick masonry, or inside a closed cabinet; these can weaken the wireless connection.
Check: Each planned position has a practical power plan and a usable wireless connection.
Step 3: Secure the account and prepare the app
Install the official camera app from your device’s app store, create or sign in to your account, and update the app if prompted. Use a unique password that you do not use on other sites, and turn on multi-factor authentication if offered. Review account recovery options and decide which household members need access. Keep the camera’s setup code and serial number private; do not post them publicly.
Tip: Use the manufacturer’s official app and support instructions. Do not scan setup codes sent by an unknown person or supplied through an unofficial download link.
Check: You can sign in, access the app’s device setup screen, and have secured the account with a unique password.
Step 4: Add and update each camera
Power on one camera at a time and follow the app’s setup flow. Scan its QR code or enter its setup details when requested, then select the correct Wi-Fi network and enter the password carefully. Wait for the app to confirm that the camera is online before adding the next one. Install any firmware update the app offers, keeping the camera powered and connected until the update finishes. Give each camera a clear name based on its location, such as “Front Door.”
Tip: If setup fails, check whether the camera requires 2.4 GHz Wi-Fi and whether your phone is connected to the same home network. Do not reset a camera during a firmware update.
Check: The app lists each camera as online, shows its live view, and reports no unfinished update.
Step 5: Mount and aim the cameras
Use the app’s live view to test the planned angle before fixing the mount. Hold the camera in place, check the frame, and adjust until the key approach area is visible. Mark the mounting holes, then attach the bracket using the supplied hardware and instructions. For a battery camera, fit or charge the battery as directed. For wired equipment, use the specified power supply and keep connections protected as instructed. Do not modify mains wiring unless you are qualified to do so. Attach the camera and tighten its mount without overtightening.
Tip: Follow the maker’s specified mounting height and orientation. If you use a ladder, place it on stable ground and have another person nearby when possible.
Check: The camera is firmly attached, stays in position, and shows the intended area without being blocked by a wall, roof edge, or plant.
Step 6: Set recording, alerts, and privacy controls
In the app, choose when each camera records: continuously, on motion, or on a schedule, according to its features and your needs. Set motion zones to cover the relevant path and exclude busy roads, swaying trees, or other sources of repeated alerts. Adjust sensitivity if the app allows it. Choose notification times and people who should receive alerts. Review recording storage options, subscription terms, retention settings, and who can view or share footage. Use privacy zones, audio controls, and camera-off schedules where available, and tell household members and visitors about recording where appropriate.
Tip: Start with moderate motion sensitivity and a focused zone. Broad zones and high sensitivity can create frequent alerts that are easy to ignore.
Check: Recording and notification settings match the intended use, and you know where footage is stored and who can access it.
Step 7: Test the full system
Walk through each camera’s view at the times and distances that matter. Check the live image, then trigger an event to confirm that recording starts and an alert reaches the intended phone. Open the recorded clip and verify that it has useful detail, correct time and date, and playable audio or video as expected. Test the camera at night if it will be used after dark. Check that alert zones exclude routine activity and that each household member has only the access they need.
Tip: Test one camera at a time and note any delay, blind spot, or repeated false alert before changing settings.
Check: Each camera provides a clear live view, creates a retrievable recording, and sends the expected alert without covering private areas unnecessarily.
Common Mistakes to Avoid
- Keeping default account security or sharing access too widely. — Use a unique password, enable multi-factor authentication when available, and grant access only to people who need it.
Troubleshooting
Problem: The camera works in daytime but the night image is poor.
Solution:
Clean the lens and check that the camera’s night mode is enabled. Re-aim it away from nearby walls, glass, or reflective surfaces that can bounce infrared light back into the lens. Add suitable outdoor lighting if the camera’s night-vision range does not cover the area.
What Success Looks Like
The setup is complete when every camera remains online at its installed location, shows the area it was assigned to cover, and produces a playable recording after a test event. Expected alerts reach the selected devices, false alerts are manageable, account access is protected, and camera views avoid unnecessary recording of private spaces or neighboring property.
Next Steps
Check the camera views and alerts again after several days, then refine motion zones and sensitivity based on actual events. Set a recurring reminder to check battery levels, lens cleanliness, account access, firmware notices, and storage availability. Review app permissions and shared users when household arrangements change. If a camera repeatedly disconnects, overheats, admits water, or requires electrical work beyond the manufacturer’s instructions, stop using it and contact the maker or a qualified installer.
Frequently Asked Questions
Do I need a subscription to use a smart camera?
It depends on the model. Some cameras include local storage or basic live viewing without a paid plan, while cloud recording, longer clip history, or advanced alerts may require a subscription. Check which features stop working if a trial ends before relying on them.
Cold & flu season Picks
humidifiers
As an affiliate, we earn on qualifying purchases.