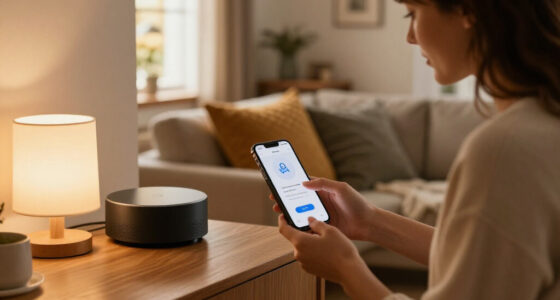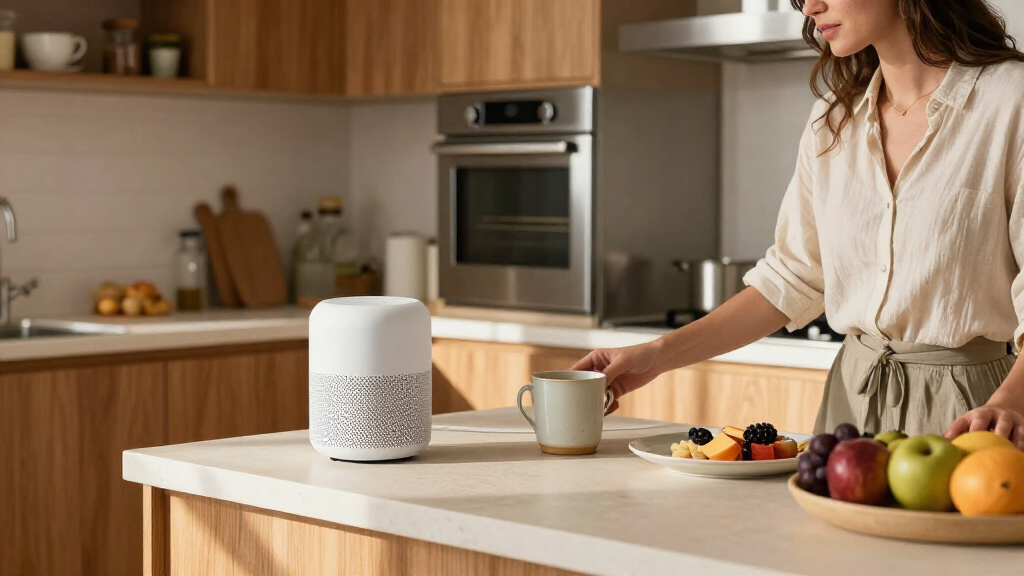
Set up a smart home voice assistant so you can control compatible lights, plugs, thermostats, or other devices with spoken commands. This guide is for beginners with a phone or tablet and a home Wi-Fi network. Allow 30–60 minutes; setup time varies with the number of devices and the provider’s app.

Get home appliances delivered free with Prime
- Fast, free delivery on millions of items
- Prime Video, Amazon Music and more included
- Member-only deals all year

Amazon Echo Dot Max with Smart Plug Bundle
- ✔ Voice assistant: Alexa
- ✔ Smart home hub: Zigbee, Matter, Thread Border Router
- ✔ Sensors: Temperature, light, presence, accelerometer
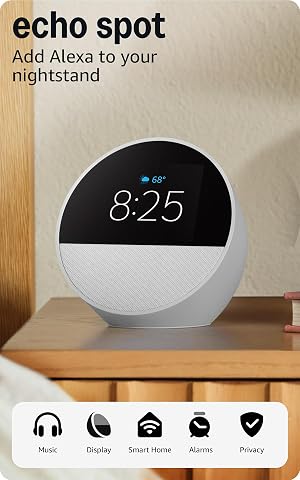
Echo Spot Smart Alarm Clock – Glacier White
- ✔ Voice assistant: Alexa
- ✔ Display: 2.83-inch touchscreen, 240 × 320 pixels
- ✔ Camera: None
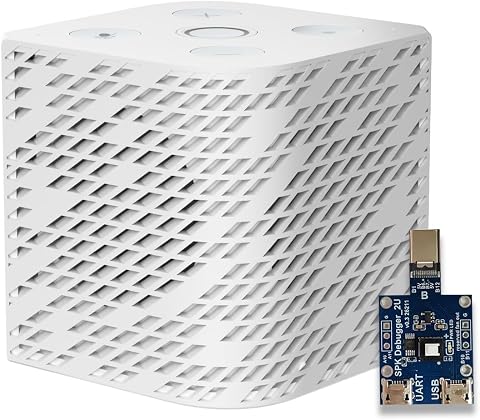
Third Reality Voice/Music Assistant Dev Edition
- ✔ Platform: Linux with Home Assistant Voice Assistant and Music Assistant
- ✔ Processor: Quad-core ARM A53
- ✔ Memory: 256 MB RAM
Difficulty: Beginner | Time: 30–60 minutes
What You’ll Need
Tools & Materials:
- A smart speaker or display, or a phone with a voice assistant
- Phone or tablet with the assistant’s official app installed
- Home Wi-Fi name and password
- Compatible smart home devices and their setup instructions
Knowledge:
- Basic ability to install an app and connect a device to Wi-Fi
- The ability to identify your Wi-Fi network and password
Check that each smart device works with your assistant’s platform before buying or pairing it. Some devices require a separate manufacturer app, a hub, or a 2.4 GHz Wi-Fi network. Keep product labels and setup codes nearby.
Amazon Echo Dot Max with Smart Plug Bundle
The Echo Dot Max bundle is our most complete choice for buyers who want a voice assistant to do more than answer questions or play music. Alexa, a built-in Zigbee, Matter, and Thread hub, and onboard sensors give it several routes to smart home control: compatible devices can be managed by voice, while presence, temperature, or light readings can support routines. The included Smart Plug adds a practical starting point for an appliance with a physical on/off switch.That breadth puts it ahead of the Echo Spot as a control center. The Spot adds a useful clock display and eero extension, but its listed features do not include the Max’s dedicated smart home hub and sensor set. Against the Third Reality Dev Edition, the Max is the more accessible choice for an Alexa household and supports several device standards in one speaker. Third Reality is better aligned with people building around Home Assistant and customization.There are ecosystem conditions to keep in mind. The eero extension works only with a compatible eero network and has a stated limit of up to 100 Mbps and ten or fewer connected devices on the 5 GHz band. The Smart Plug is also not suitable for every appliance: the connected device needs a physical on/off switch. We would choose this bundle for the combination of voice routines and device compatibility, not because every accessory or network feature works universally.
Pros:
- Alexa voice control with Zigbee, Matter, and Thread support in the built-in hub
- Presence, temperature, and light sensors can support more context-aware routines
- Included Smart Plug adds scheduling and voice control for compatible appliances
- Room-adaptive playback and stronger bass than the 2022 Echo Dot, according to the product description
Cons:
- eero extension requires a compatible eero network, account linking, and the eero app
- The Smart Plug only suits appliances with a physical on/off switch
- eero Built-in has stated speed and connected-device limits
Best for: Alexa households that want a speaker, a multi-protocol smart home hub, sensors for routines, and a plug to bring one compatible appliance into voice control.
Not ideal for: Buyers building a Home Assistant-first or Alexa-free home, or those who need an eero extender without compatible eero equipment.
Bottom line: Choose the Echo Dot Max bundle when you want Alexa to serve as both a capable speaker and a broad smart home control point.
“Choose the Echo Dot Max bundle when you want Alexa to serve as both a capable speaker and a broad smart home control point.”
Echo Spot Smart Alarm Clock – Glacier White
The Echo Spot earns its place by making voice assistance part of the bedside routine. Its compact touchscreen shows the time and customizable information, such as weather or song titles, so we can glance at useful details instead of asking Alexa for every update. The no-camera design may also appeal to buyers who want a screen without bringing a camera into the bedroom.Compared with the Echo Dot Max, the Spot puts more emphasis on clock display and bedside convenience than on being the center of a complex smart home. It can control compatible devices with Alexa and includes eero extension, but its listed specs do not provide the Max’s Zigbee, Matter, and Thread hub or its range of sensors. Third Reality takes another route altogether: it is a customizable Home Assistant device, whereas the Spot is the more familiar Alexa option for people who want a visible clock and simple voice control.The display is small, and the lack of a camera means it is not the pick for video calls or facial recognition. Bluetooth support also has specific limitations, including no hands-free support for Mac OS X and no support for PIN-code speakers. Its eero extension has a device and speed limit, so we would treat that as a modest convenience for compatible eero owners rather than a replacement for a full networking solution. The Spot makes the most sense when the screen earns its bedside space; buyers focused on device protocols should look to the Max.
Pros:
- Customizable touchscreen can show time, weather, and song information
- Alexa enables voice control for compatible smart home devices, reminders, and music
- No camera, which may suit buyers who prefer a screen without bedroom video capture
- Built-in eero extension can add coverage to a compatible network
Cons:
- No camera for video calls or facial recognition
- Bluetooth compatibility excludes PIN-code speakers and Mac OS X hands-free use
- eero extension is limited and depends on compatible eero equipment
Best for: People who want Alexa at a bedside or desk, with an easy-to-read clock face and quick visual information alongside voice control.
Not ideal for: Buyers who need a camera, broad Bluetooth compatibility, or an advanced built-in smart home hub with multiple device protocols.
Bottom line: Pick the Echo Spot if a glanceable Alexa bedside clock matters more to you than the Echo Dot Max’s deeper smart home hardware.
“Pick the Echo Spot if a glanceable Alexa bedside clock matters more to you than the Echo Dot Max’s deeper smart home hardware.”
Third Reality Voice/Music Assistant Dev Edition
Third Reality’s Dev Edition serves a different kind of smart home: one built around Home Assistant, open-source software, and hands-on customization. It arrives with Home Assistant Voice Assistant and Music Assistant, so it is designed to become part of that environment rather than acting as another Alexa speaker. Dual digital microphones handle voice capture, and the integrated 3 W speaker supports local text-to-speech and music playback in a compact cube.This makes it a more specialized pick than either Echo. The Echo Dot Max is the stronger general recommendation for buyers who want Alexa plus multiple common smart home protocols in the device. The Echo Spot is easier to understand as an everyday clock and voice assistant. Third Reality instead appeals to people who already want to build or manage their home through Home Assistant and value the ability to customize firmware and inspect logs. Its role is distinct: flexibility for builders over a turnkey mainstream experience.The compact Linux hardware also imposes real limits. The device has 256 MB of RAM and 512 MB of storage, which may restrict heavier applications or future expansion. It connects over 2.4 GHz Wi-Fi only, so the listed connectivity does not offer Ethernet or 5 GHz Wi-Fi. Buyers who want a polished, general-purpose smart speaker or broad out-of-the-box compatibility may find an Echo more straightforward. For Home Assistant hobbyists comfortable with a focused device, those tradeoffs may be acceptable in exchange for an open platform and local-first orientation.
Pros:
- Preloaded Home Assistant Voice Assistant and Music Assistant
- Dual digital microphones support voice capture and wake-word use
- Integrated speaker supports local text-to-speech and music playback
- Linux platform enables firmware customization and access to logs
Cons:
- 256 MB RAM and 512 MB storage may constrain demanding applications and expansion
- 2.4 GHz Wi-Fi only limits network options and placement flexibility
- More specialized setup and ecosystem fit than the Alexa Echo options
Best for: Home Assistant users and smart home hobbyists who want a compact voice and music endpoint they can customize within an open-source environment.
Not ideal for: People who want a conventional Alexa assistant, more onboard resources for demanding apps, or connectivity beyond 2.4 GHz Wi-Fi.
Bottom line: Choose Third Reality when Home Assistant customization matters more than Alexa convenience or broader hardware headroom.
“Choose Third Reality when Home Assistant customization matters more than Alexa convenience or broader hardware headroom.”
As an Amazon Associate we earn from qualifying purchases.
Before You Start
Place the speaker where it can hear you and where its microphone is not blocked. Use a stable surface away from sinks, cooking areas, and heavy foot traffic. Review the assistant’s privacy controls before enabling voice history, shopping, calling, or routines. Avoid sharing your Wi-Fi password or account credentials with anyone helping you set up.
Step-by-Step Instructions
Step 1: Install the assistant app
Download the official app for your speaker or voice assistant from your phone’s app store. Open it, sign in to the account you plan to use, and follow the prompts to allow the permissions needed for setup, such as Bluetooth or local network access.
Tip:Use the same account on the app and speaker. A work or child account may restrict device setup or purchases.
Check: The app opens to its home screen and shows the account you intend to use.
Step 2: Power on and add the speaker
Connect the speaker or display to power. In the app, choose the option to add or set up a device, select the correct model, and follow the on-screen instructions. If prompted, confirm a code or sound from the speaker.
Tip:If the app cannot find the speaker, keep your phone near it and turn on Bluetooth. Check the model name on the device before selecting it in the app.
Check: The app lists the speaker as set up, online, or ready to configure.
Step 3: Connect the speaker to Wi-Fi
Select your home Wi-Fi network in the app and enter its password. Wait for the speaker to connect before closing the setup screen. If the app asks for a network band, choose one supported by the speaker; many devices need 2.4 GHz Wi-Fi.
Tip:Enter the password exactly as shown, including capital letters. Do not use a guest network that blocks communication between devices.
Check: The speaker appears online in the app and can respond to a basic prompt such as the time or weather.
Step 4: Set location, language, and voice options
Choose the language and region you want the assistant to use. Set the home address or room location if you want local weather, time-based routines, or location features. Review voice recognition options and add household members only if they need personalized results.
Tip:Location and voice profile features may involve storing personal data. Check the privacy settings and choose only the features you plan to use.
Check: The assistant responds in the selected language and gives local information when asked.
Step 5: Pair one smart device
Set up a compatible light, plug, thermostat, or other device using its manufacturer’s instructions. Install its official app if required, connect it to Wi-Fi or a hub, then return to the assistant app and choose the option to link a service or discover devices. Sign in to the manufacturer account if prompted.
Tip:Pair one device first. This makes it easier to identify whether a problem comes from the device, its app, or the assistant connection.
Check: The device appears in the assistant app and shows as available or online.
Step 6: Assign a clear device name and room
Rename the device with a short, distinct phrase such as “desk lamp” or “hallway light.” Assign it to the room where it is installed. Avoid names that sound alike or duplicate the assistant’s wake word.
Tip:Room names help the assistant interpret commands such as “turn off the lights in the kitchen.”
Check: The device appears under the right room with the name you chose.
Step 7: Test voice commands
Stand where the speaker can hear you and use its wake word followed by a simple request, such as “turn on the desk lamp.” Test turning the device off as well. If the assistant asks which device you mean, repeat the request using the device’s full name or room.
Tip:Speak at a normal volume and reduce nearby noise during the first test. Check the microphone mute switch if the assistant does not respond.
Check: The speaker acknowledges the command and the device changes state within a few seconds.
Step 8: Review security and privacy controls
Open the app’s privacy and security settings. Review voice recording history, microphone controls, account access, purchase approvals, and any options for deleting stored recordings. Set a purchase PIN or disable voice purchases if you do not need them. Use a strong, unique password for the assistant account.
Tip:Do not place a voice assistant where private conversations are expected if its microphone will remain active.
Check: You can locate the microphone control and account privacy settings, and purchases require the approval level you chose.
Step 9: Add devices and optional routines gradually
Repeat the pairing process for each additional compatible device. Add a routine only after its individual devices work reliably. Give each routine a clear trigger and check every action, such as lights turning off at a set time, before relying on it.
Tip:Keep routines simple at first. A routine that controls several devices is harder to troubleshoot than a single-device command.
Check: Each added device appears in the correct room, and each routine performs only the actions you configured.
Common Mistakes to Avoid
- Choosing a smart device that does not work with the assistant platform. — Check the device packaging or manufacturer’s compatibility list before purchase, and confirm whether a hub or subscription is required.
- Entering the wrong Wi-Fi password or using an unsupported network band. — Verify the password and check the device’s Wi-Fi requirements. Use the main home network if a guest network prevents device discovery.
- Using vague or similar names for devices. — Give each device a distinct short name and assign it to the room where it is installed.
- Adding multiple devices before confirming the first one works. — Pair and test devices one at a time so you can isolate setup problems.
Troubleshooting
Problem: The assistant does not respond to the wake word.
Solution: Check that the speaker has power and is connected to Wi-Fi. Make sure its microphone is not muted, move closer, reduce background noise, and confirm the wake word setting in the app.
Problem: The assistant app cannot find a smart device.
Solution: Confirm the device works in its manufacturer app, then check that it is online and on a compatible network. Relink the manufacturer service or run device discovery again in the assistant app.
Problem: A voice command is understood but the device does not change state.
Solution: Check the device’s power, connection, and status in its own app. Try the command using the exact device name, then restart the device if it remains unresponsive.
Problem: Setup fails on the Wi-Fi step.
Solution: Re-enter the password, bring the speaker closer to the router, and check whether the product requires 2.4 GHz Wi-Fi. Restart the router and speaker if the connection still fails, then retry setup.
What Success Looks Like
The speaker is online in its official app, responds to its wake word, and can control each paired device by its distinct name. Devices appear in the correct rooms, optional routines run as configured, and you can find the microphone, recording, and purchase controls in the app.
Next Steps
Keep the assistant and device apps updated, and check device status after router or Wi-Fi changes. Review privacy and purchase settings when household members change. Add new devices one at a time, testing each before adding it to a routine. If a device repeatedly disconnects, consult its manufacturer’s setup guide or support page.
Frequently Asked Questions
Can I use smart devices from different brands with one assistant?
Often, yes, if each device supports the assistant’s platform. Some devices need their manufacturer app, a hub, or a linked account. Check compatibility before purchasing.
Does the voice assistant need the internet to control devices?
Many assistants rely on an internet connection to interpret commands and reach cloud services. Some hubs support limited local control, but offline behavior depends on the assistant and device model.
Can I stop the assistant from saving voice recordings?
Many platforms offer controls to disable or limit voice history and to delete saved recordings. Find these options in the account’s privacy settings; available controls vary by provider.
Why does the assistant control one device but not another?
The devices may use different accounts, networks, or compatibility features. Check each device in its manufacturer app, confirm its service is linked in the assistant app, and run device discovery again.