This guide walks you through installing and configuring a smart home energy monitor to track your household’s energy use. Suitable for homeowners or tech enthusiasts, this process helps you understand your energy consumption and identify savings opportunities. Complete this task efficiently within 30 to 60 minutes.

Emporia Vue 3 Home Energy Monitor – Real-Time Electricity Usage & Solar Monitoring
- ✔ Certification: UL Listed, CE Listed
- ✔ Installation: Circuit panel with clamp-on sensors
- ✔ Supported Systems: Single phase, split phase, 2-wire, 3-wire, 3-phase, 4-wire Wye

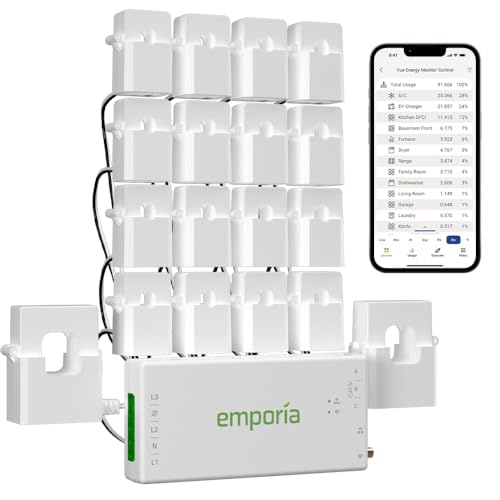
Smart Home Energy Monitor with 16 50A Circuit Sensors, Real-Time Power Usage & Cost Tracking, Compatible with Home Assistant
- ✔ Sensors: 16 50A sensors
- ✔ Supported Voltages: Single-phase up to 240VAC, three-phase up to 415Y/240VAC
- ✔ Connectivity: WiFi 2.4GHz, MQTT, LAN

Refoss Smart Home Energy Monitor with Open API & Web UI
- ✔ Accuracy: ±1% (200A: 2–200A; 60A: 1–60A)
- ✔ Data Storage: Up to 5 years
- ✔ Installation: Clamp-on, supports 2 main circuits and 16 branch sensors
Difficulty: Intermediate | Time: 30-60 minutes
What You’ll Need
Tools & Materials:
- drill (if mounting needed)
- screwdriver
- wire strippers
- voltage tester
Knowledge:
- basic electrical safety
- familiarity with Wi-Fi setup
- ability to read electrical panel diagrams
Ensure your household power is turned off before working inside the electrical panel. Confirm compatibility of the energy monitor with your home’s voltage and circuit type. Have your Wi-Fi network details ready.
Emporia Vue 3 Home Energy Monitor - Smart Home Automation Module and Real Time Electricity Usage Monitor, Power Consumption Meter, Solar and Net Metering for UL Certified Safe Energy Monitoring
SAFETY YOU CAN TRUST WITH UL CERTIFICATION: With Emporia Energy, your home energy monitoring is safe, reliable, and...
As an affiliate, we earn on qualifying purchases.
Emporia Vue 3 Home Energy Monitor – Real-Time Electricity Usage & Solar Monitoring
The Emporia Vue 3 stands out for its comprehensive safety certifications, including UL and CE, which provide peace of mind for residential installation. It offers detailed real-time energy data, supports solar net metering, and includes 16 sensors for monitoring critical loads. Compared to the other options, it is more versatile for solar owners and those seeking certified safety standards. However, it requires WiFi and internet for full functionality, and an extra sensor must be purchased for 3-phase systems. Its installation in the circuit panel is straightforward but may be more complex for multi-phase setups.
Pros:
- UL and CE certified for safety and reliability
- Supports solar monitoring and net metering
- Includes 16 sensors for critical load insights
- Compatible with various smart home devices
Cons:
- Requires WiFi and internet for full features
- Additional sensor needed for 3-phase systems
Best for: Homeowners with solar panels and high safety standards, seeking detailed real-time data and certified reliability.
Not ideal for: Renters, or users with limited internet access, or those with complex three-phase systems without additional sensors.
Bottom line: A top choice for solar owners and safety-conscious users who want detailed, certified energy data.
“A top choice for solar owners and safety-conscious users who want detailed, certified energy data.”

Smart Home Energy Monitor with 16 50A Circuit Level Sensors, Real-Time Power Usage & Electricity Cost Tracking, Ideal for Rental Homes & Shared Apartments, App History, Compatible with Home Assistant
⚡ EASY INSTALLATION: Installs in circuit panel of most homes with clamp-on sensors. Supports single-phase up to 240VAC...
As an affiliate, we earn on qualifying purchases.
Smart Home Energy Monitor with 16 50A Circuit Sensors, Real-Time Power Usage & Cost Tracking, Compatible with Home Assistant
This monitor makes installation simple with clamp-on sensors and excels at local control, supporting multiple circuits and phases without relying on cloud services. It offers real-time power data and cost tracking via WiFi and MQTT, making it ideal for users who prefer privacy or run complex multi-circuit setups in rental or shared homes. The need for MQTT server setup and lack of cloud storage are tradeoffs, requiring some technical know-how. Its limited voltage support (up to 240VAC single-phase and 415Y/240VAC three-phase) makes it less suitable for more complex or industrial systems.
Pros:
- Easy clamp-on installation
- Supports multiple circuits and phases
- Local data processing without cloud dependency
- Compatible with Home Assistant and MQTT
Cons:
- Requires MQTT server and setup
- No included batteries or cloud storage
- Limited to 240VAC single-phase or 415Y/240VAC three-phase systems
Best for: Tech-savvy users managing multiple circuits with a preference for local control and privacy.
Not ideal for: Users seeking plug-and-play solutions or cloud-based monitoring without setup complexity.
Bottom line: Best suited for technically skilled users seeking private, flexible multi-circuit energy monitoring.
“Best suited for technically skilled users seeking private, flexible multi-circuit energy monitoring.”

Refoss Smart Home Energy Monitor, Native Open API & Web UI (No Cloud Required), Real Time Electricity Usage Monitor, Power Consumption Meter Works with Home Assistant & MQTT, Solar Net Metering, ETL
LOCAL CONTROL & DATA PRIVACY: Access your home energy monitor data locally via Built-in Web UI, Open API,...
As an affiliate, we earn on qualifying purchases.
Refoss Smart Home Energy Monitor with Open API & Web UI
The Refoss Smart Home Energy Monitor is tailored for advanced users who prioritize data privacy and local control. Its high accuracy ±1% makes it reliable for detailed energy analysis, and its open API, Web UI, and MQTT support allow seamless integration with home automation platforms like Home Assistant and AI systems. While setup can be more involved, especially for configuring APIs and MQTT, it offers a level of control and security that cloud-dependent solutions lack. Its support for two main circuits and 16 branch sensors fits well in both residential and small commercial environments, but it doesn’t support larger or industrial systems.
Pros:
- Supports local control via Web UI, Open API, and MQTT
- High accuracy with ±1% measurement
- Supports up to 2 main circuits and 16 branch sensors
- Easy clamp-on installation
Cons:
- Requires technical setup for API and MQTT
- Limited circuit capacity for large systems
- No cloud storage or subscription services included
Best for: DIY enthusiasts, privacy-conscious users, and those integrating energy data into custom automation workflows.
Not ideal for: Users seeking plug-and-play, cloud-based solutions, or with very high circuit capacities.
Bottom line: Perfect for users who want full control, privacy, and integration with home automation and AI systems.
“Perfect for users who want full control, privacy, and integration with home automation and AI systems.”
As an Amazon Associate we earn from qualifying purchases.
Before You Start
Disconnect power at the main breaker to prevent electrical shock. Verify the circuit you plan to monitor is safely de-energized using a voltage tester. Review your home’s electrical diagram if available to identify appropriate circuits for monitoring.
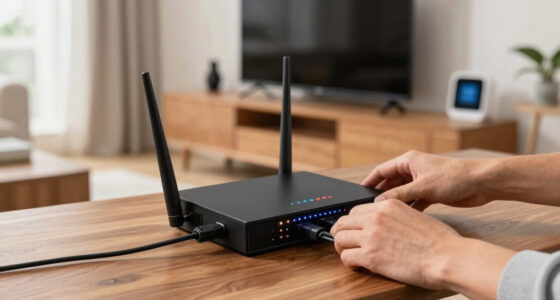
Step-by-Step Instructions
Step 1: Choose the circuit to monitor
Identify the electrical circuit you want to track, such as the main panel or specific appliances. Turn off power at the main breaker, then locate the circuit breaker for that circuit in your electrical panel.
Tip: Use your electrical panel diagram or labels to find the correct breaker. Avoid monitoring circuits that are sensitive or critical if you’re unsure.
Check: You have identified the correct circuit breaker and confirmed the circuit is de-energized.
Step 2: Install the current sensor on the circuit breaker
Attach the current sensor clamp around the wire of the circuit breaker you selected, following the monitor’s manufacturer instructions. Ensure the clamp is securely closed and properly aligned.
Tip: Make sure the sensor is oriented correctly (directional clamps if applicable) and that it is tight around the wire without pinching or slipping.
Check: The sensor is firmly attached and correctly oriented around the wire, with no loose connections.
Step 3: Connect the monitor to power and Wi-Fi
Connect the energy monitor’s hub or display unit to a power source. Download the manufacturer’s app on your smartphone or tablet. Follow the app’s instructions to connect the monitor to your Wi-Fi network.
Tip: Ensure your Wi-Fi signal is strong at the monitor’s location. Use a 2.4 GHz network if the device recommends it for better compatibility.
Check: The monitor successfully connects to your Wi-Fi and appears in the app as an active device.
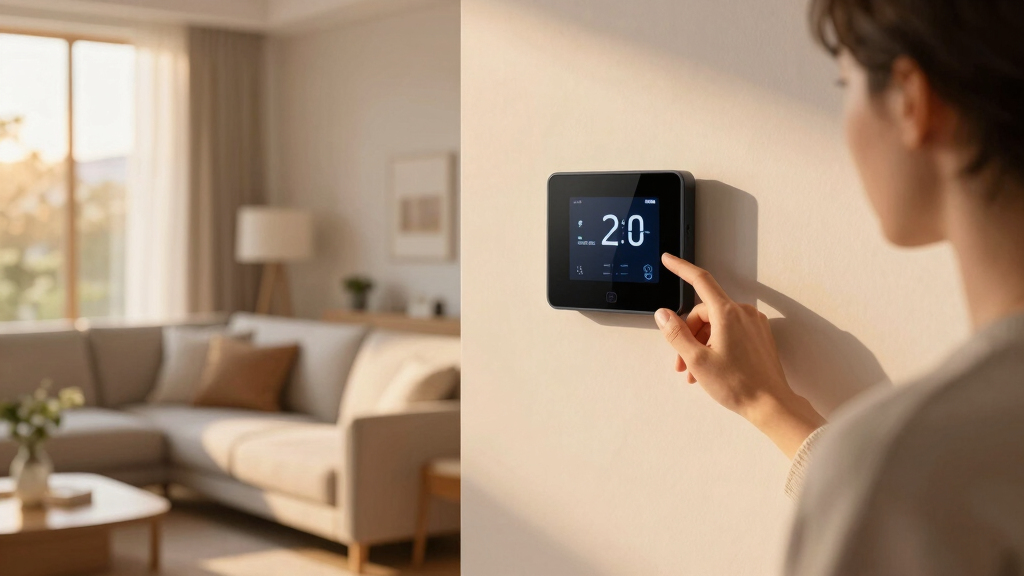
Step 4: Configure the monitor and calibrate if needed
Open the app and follow prompts to assign the monitor to the correct circuit or device. Perform any calibration steps recommended by the manufacturer to ensure accurate readings.
Tip: Perform a test by turning on or off the monitored circuit to verify the monitor detects the change in energy usage.
Check: The app shows real-time data matching your circuit’s activity, confirming proper setup.
Step 5: Monitor and interpret energy data
Use the app to review your household’s energy consumption patterns. Identify periods of high usage and check which devices contribute most. Set alerts or schedules if available.
Tip: Regularly review the data over a week to understand typical energy use patterns and identify savings opportunities.
Check: You can view real-time and historical energy data, and the information accurately reflects your household’s consumption.
Common Mistakes to Avoid
- Incorrectly wiring the current sensor or attaching it to the wrong circuit. — Double-check your electrical diagram and verify the circuit before attaching the sensor. Use a voltage tester to confirm power is off.
- Installing the monitor in a location with poor Wi-Fi signal. — Place the hub or Wi-Fi module within good range of your wireless router, or use a Wi-Fi extender if necessary.
- Not following safety procedures when working inside the electrical panel. — Always turn off power at the main breaker, verify with a voltage tester, and work carefully to avoid contact with live parts.
Troubleshooting
Problem: Monitor fails to connect to Wi-Fi.
Solution: Reset the monitor and restart your router. Ensure you’re on the correct Wi-Fi band and that your network credentials are correct.
Problem: Monitor shows no data or inconsistent readings.
Solution: Check that the sensor is properly attached and oriented. Recalibrate if needed, or replace the sensor if it appears faulty.
Problem: Energy data does not match actual circuit activity.
Solution: Verify the correct circuit is monitored, and confirm the sensor is correctly installed and calibrated. Test by toggling the circuit.
What Success Looks Like
The monitor displays real-time energy consumption data in the app that matches your household circuit’s activity. Historical data appears accurate, and alerts or reports are functioning as configured.
Next Steps
Use the data to identify high energy-consuming devices and consider adjustments to reduce usage. Schedule regular checks or updates for your monitor. Explore app features like cost estimation or automation integrations for further savings.
Frequently Asked Questions
Can I install a smart energy monitor myself?
Yes, if you have basic electrical knowledge and follow safety precautions. For complex wiring or high-voltage systems, consult a licensed electrician.
Will installing a monitor affect my household wiring?
No, the sensor clamps around existing wires without altering your wiring system. Proper installation is essential for accurate readings and safety.
How accurate are these energy monitors?
Most monitors provide reasonable accuracy for household energy use, typically within 5-10%. Calibration and correct installation improve precision.
Can I monitor multiple circuits with one device?
Some models support multiple sensors or circuits. Check your device specifications to see if it fits your needs or if multiple units are required.
What should I do if my monitor stops working?
Restart the device, check Wi-Fi connection, and verify sensor placement. Contact customer support if issues persist.